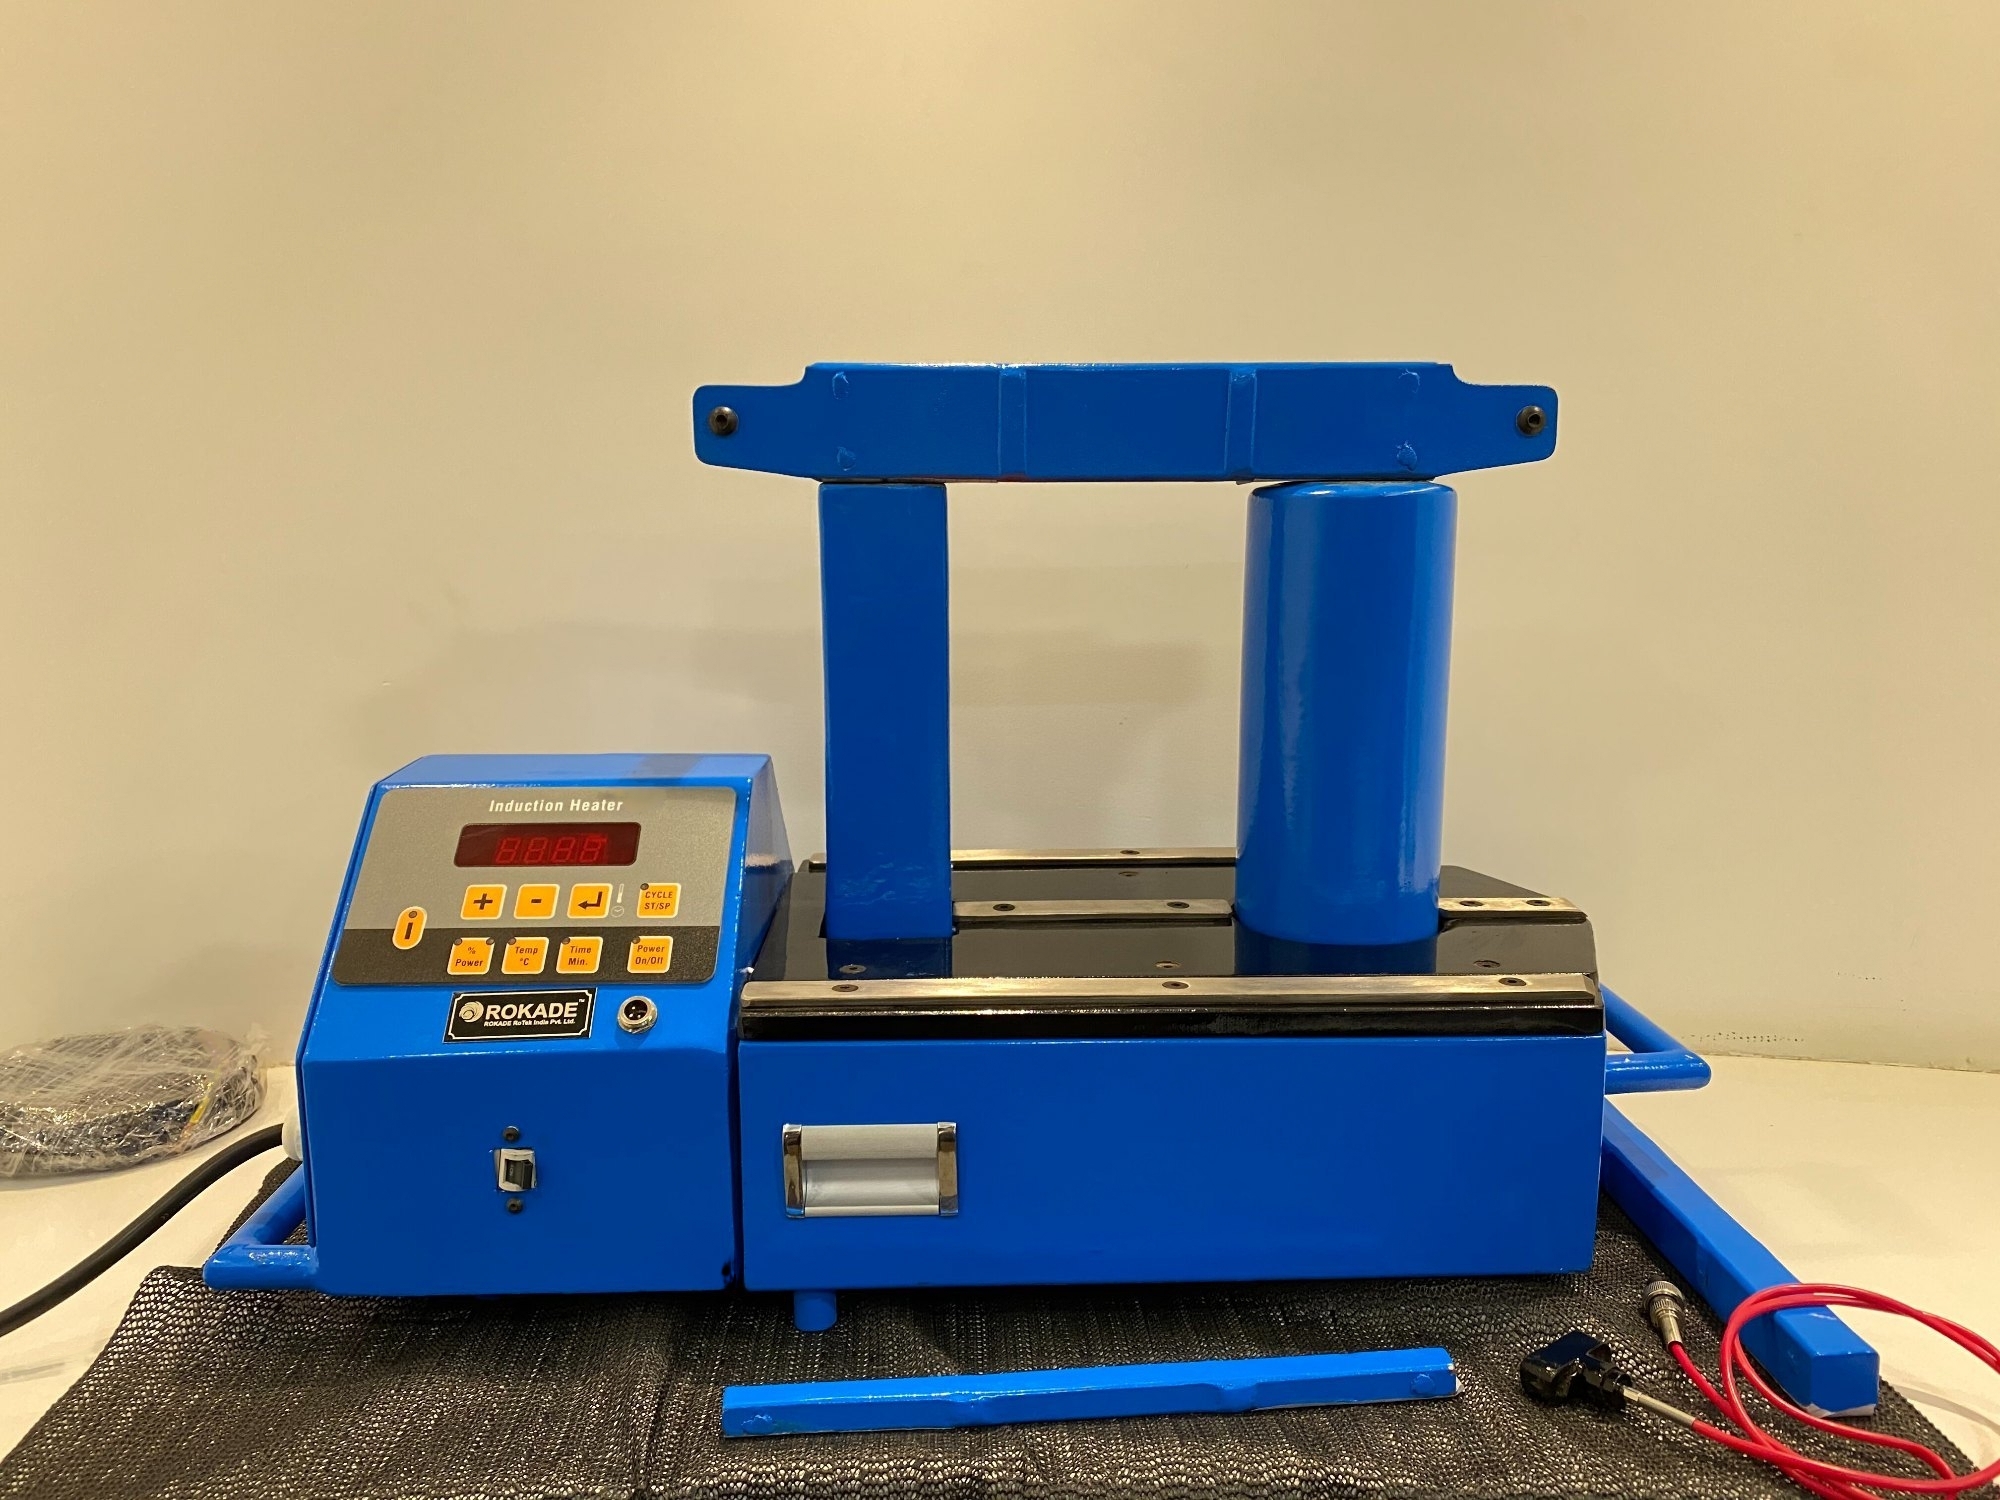
What Is a Bearing Induction Heater?
A bearing induction heater is an industrial tool used to heat bearings and other metallic components through electromagnetic induction. The purpose is to expand the bearing’s inner diameter, allowing for a secure and stress-free fit onto shafts.
This non-contact heating method ensures precision, reduces the risk of uneven heating, and eliminates contamination risks, making it essential for industries like automotive, manufacturing, and aerospace.
How Does a Bearing Induction Heater Work?
A bearing induction heater uses electromagnetic induction to generate heat within the metallic structure of the bearing. Here’s the process in simple terms:
- Induction Coil: The coil generates a magnetic field when an electric current passes through it.
- Heat Generation: This magnetic field induces eddy currents in the bearing, causing it to heat up.
- Thermal Expansion: The controlled heating causes the bearing to expand, making installation easier.
The precision of this process ensures that only the bearing is heated while the surrounding components remain unaffected.
Key Components of a Bearing Induction Heater
Understanding the components helps in better installation and maintenance:
- Induction Coil: Generates the magnetic field.
- Control Panel: Allows users to set temperature and time.
- Temperature Sensors: Monitor the heating process to prevent overheating.
- Yokes: Support the bearing during heating.
- Power Source: Supplies energy to the induction coil.
Each component plays a critical role in the efficiency of the heater.
Installation Guide: Step-by-Step Process
Proper installation ensures the efficient working of the bearing induction heater. Follow these steps:
Prepare the Workspace: Ensure the area is clean and free of dust or contaminants.
- Inspect the Equipment: Check all components of the heater, including the induction coil and control panel, for any visible damage.
- Set Up the Heater:
- Place the heater on a stable, non-conductive surface.
- Attach the appropriate yoke to support the bearing.
- Connect the Power Supply: Verify that the power source matches the specifications of the heater.
- Position the Bearing: Place the bearing horizontally on the yoke, ensuring it’s centered.
- Program the Heater: Use the control panel to set the desired temperature and heating duration.
- Start the Heating Process: Monitor the process via the temperature sensors. Once the set temperature is reached, remove the bearing promptly.
Common Challenges During Installation
Despite being straightforward, installation can encounter challenges:
- Inadequate Power Supply: Ensure the power source meets the heater’s requirements.
- Improper Positioning: Misaligned bearings may result in uneven heating.
- Damaged Components: Inspect for wear and tear before starting the process.
Addressing these challenges ensures smooth operation and prolongs the heater’s lifespan.
Debugging: Identifying and Resolving Issues
When the heater doesn’t function as expected, follow these debugging steps:
- Check Power Connections: Verify that all cables and connectors are properly attached.
- Inspect the Induction Coil: Look for physical damage or loose windings.
- Examine the Control Panel: Ensure that temperature settings are accurate and buttons are responsive.
- Test the Temperature Sensor: Faulty sensors may cause overheating or underheating. Replace them if necessary.
- Review the Operating Manual: Manufacturer instructions often provide troubleshooting tips for specific issues.
Pro Tip: Regular maintenance and inspections can prevent most issues before they escalate.
Understanding the Working Principle of Bearing Induction Heaters
The working principle relies on Faraday’s Law of Electromagnetic Induction, which states that a changing magnetic field induces an electric current in a conductive material. Here’s how it applies to a bearing induction heater:
- The induction coil generates an alternating magnetic field.
- This field penetrates the bearing’s metallic structure, inducing currents.
- The resistance within the bearing converts these currents into heat.
This targeted heating minimizes energy loss and ensures precise thermal expansion.
Best Practices for Maintenance and Safety
To maximize efficiency and ensure safety, follow these practices:
Maintenance:
- Regular Inspections: Check the induction coil, yokes, and control panel for wear.
- Clean the Heater: Remove dust and debris from the surface and components.
- Calibrate Sensors: Periodically test and calibrate temperature sensors.
Safety:
- Wear Protective Gear: Use gloves and goggles when handling heated components.
- Avoid Overheating: Set temperature limits to prevent damage to bearings.
- Follow Manufacturer Guidelines: Always adhere to the user manual for proper operation.
Why Choose Vivid Metrawatt’s Bearing Induction Heaters?
At Vivid Metrawatt, we specialize in high-precision bearing induction heaters designed for industrial reliability. Here’s what sets us apart:
- Advanced Technology: Our heaters feature state-of-the-art temperature controls and energy-efficient designs.
- Durability: Built with high-grade materials, ensuring longevity and minimal maintenance.
- Customization Options: Tailored solutions to meet the unique needs of your industry.
- Expert Support: Our team provides comprehensive installation and troubleshooting assistance.
Whether you’re installing a new system or upgrading your existing setup, Vivid Metrawatt ensures unparalleled performance and reliability.
Conclusion
Understanding the installation, debugging, and working principles of a bearing induction heater is essential for achieving optimal performance in industrial applications. From the initial setup to resolving issues, each step demands precision and care. By following the guidelines outlined above, you can ensure a seamless and efficient operation.
Investing in a high-quality heater, like those offered by Vivid Metrawatt, further enhances reliability, reduces downtime, and supports long-term success. Explore our range of bearing induction heaters today to experience the difference.

